*: If equipped
The Digital Rear-view Mirror is an advanced system that uses a rear-mounted camera to capture an image and display it on an integrated screen. This innovative feature allows you to view the rear of your vehicle clearly-even when traditional obstructions, such as head restraints or luggage, block the view.
By operating a dedicated lever, you can switch between optical mirror mode and digital mirror mode. In optical mode, the mirror functions like a conventional rearview mirror, while digital mode provides a dynamic, camera-based image that enhances rear visibility. Notably, when operating in digital mode, the rear seats are not displayed, thereby enhancing passenger privacy.
It is important to note that the effective image range in digital mode may differ from that of an optical mirror. Make sure to verify the displayed view thoroughly before driving.
WARNING
Observe the following precautions.
Failure to do so may result in death or serious injury.
Before Using the Digital Rear-view Mirror
Incorporating a Digital Rear-view Mirror enhances rearward visibility and overall driving safety by overcoming physical obstructions and maintaining passenger privacy. This state-of-the-art feature is found in innovative vehicles such as the Toyota bZ4X.
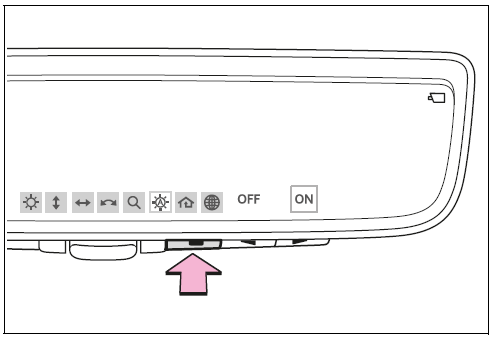
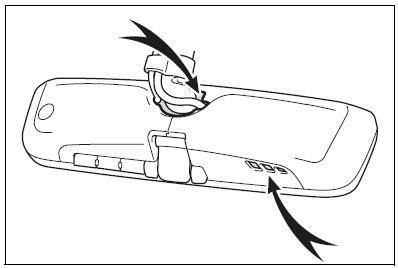
System components
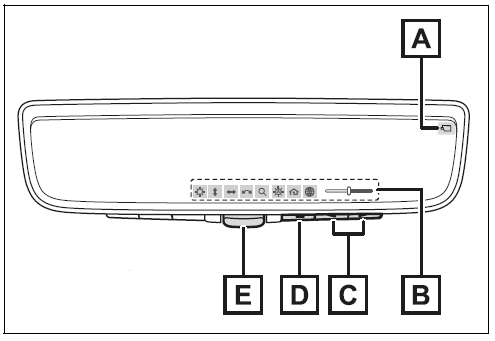
Indicates that the camera is operating normally.
Displays icons, adjusting gauge, etc.
Press to change the setting of the item you want to adjust.
Press to display the icon display area and select the item you want to adjust.
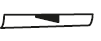
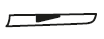
Operate to change between digital mirror mode and optical mirror mode
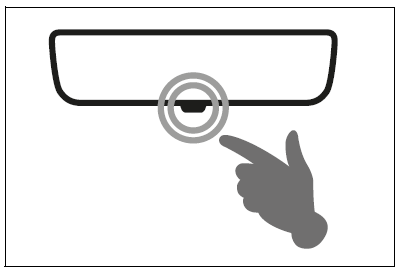
Changing modes
Operate the lever to change between digital mirror mode and optical mirror mode.

Displays an image of the area behind the vehicle.
 will
illuminate in this mode.
will
illuminate in this mode.
Turns off the display of the Digital Rear-view Mirror allows it to be used as an optical mirror.
Digital Mirror Mode Operating Condition
When the power switch is turned to ON, the Digital Rear-view Mirror (in digital mirror mode) activates and displays the rear camera’s image on the integrated screen. Conversely, if the power switch is moved from ON to OFF or ACC, the image will disappear after several seconds.
When Using the Digital Rear-view Mirror in Digital Mirror Mode
If the image is difficult to see or persistent flickering becomes distracting, switch to optical mirror mode for an improved view.
When the System Malfunctions
If a symbol (as illustrated in the system reference) appears while in digital mirror mode, it may indicate a temporary malfunction. Typically, this symbol will vanish after a few seconds. If the issue persists, operate the lever to switch back to optical mirror mode and have the system inspected by your Toyota dealer.
Experience advanced rear visibility with our Digital Rear-view Mirror system. Designed to overcome common obstructions-such as head restraints or luggage-this technology provides a clear view of the road behind, adapting to varying light conditions and ensuring enhanced safety. For example, innovative vehicles such as the Toyota bZ4X demonstrate how modern technology can seamlessly merge convenience with robust safety features.
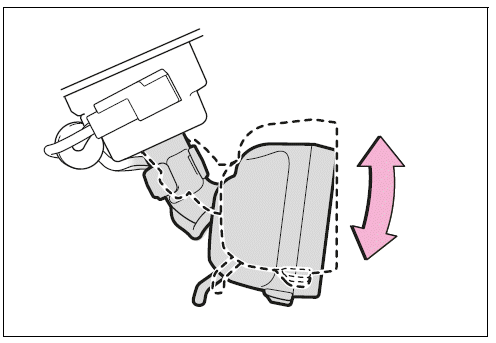
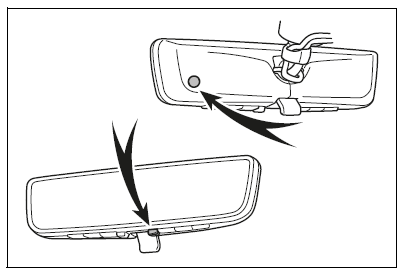
Adjusting the mirror
Adjusting the mirror height
The height of the rear view mirror can be adjusted to suit your driving posture.
Change to optical mirror mode, adjusting the height of the rear view mirror by moving it up and down.
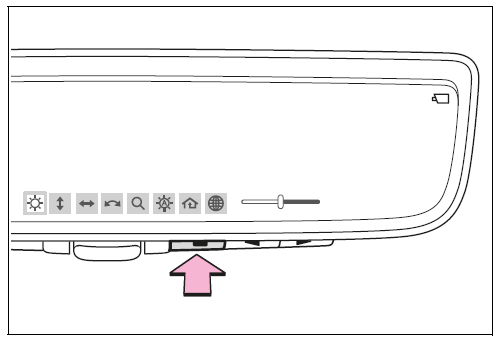
Display settings (digital mirror mode)
Settings of the display in the digital mirror mode, on/off operation of the automatic anti-glare function, etc. can be changed.
The icons will be displayed.
 or
or
 to
change the setting.
to
change the setting.
The icons will disappear if a button is not operated for approximately 5 seconds or more.
Icons / Settings
 Select to
adjust the brightness
of the display.
Select to
adjust the brightness
of the display.
 Select to adjust the area
displayed up/down.
Select to adjust the area
displayed up/down.
 Select to adjust the area
displayed to the left/right.
Select to adjust the area
displayed to the left/right.
 Select to adjust the angle of
the displayed image.
Select to adjust the angle of
the displayed image.
 Select to
zoom in/out the
displayed image.
Select to
zoom in/out the
displayed image.
 Select to
enable/disable the
automatic anti-glare function.*
Responding to the brightness
of the headlights of
vehicles behind, the
reflected light is automatically
adjusted.
Select to
enable/disable the
automatic anti-glare function.*
Responding to the brightness
of the headlights of
vehicles behind, the
reflected light is automatically
adjusted.
The automatic anti-glare function is enabled each time the power switch is changed to ON.
 Select to display Home-
Link Training Tutorial to
assist customers to train
their Garage Door Opener
System.
Select to display Home-
Link Training Tutorial to
assist customers to train
their Garage Door Opener
System.
 Select to
change the language
of the Homelink
Training Tutorial.
Select to
change the language
of the Homelink
Training Tutorial.
*: This is a function for the optical mirror mode, however, the setting can also be changed while using the digital mirror mode.
Enabling/Disabling the Automatic Anti-Glare Function (Optical Mirror Mode)
Modern vehicles offer an intelligent automatic anti-glare function in optical mirror mode, which can be enabled or disabled according to your driving preferences. This feature is versatile, as it can be adjusted whether you are using the digital mirror mode or the optical mirror mode, ensuring optimal visibility under various lighting conditions.
Once you press the menu button, the setting display appears. This display allows you to toggle the automatic anti-glare function on or off. When enabled, the system works to automatically reduce glare caused by the headlights of vehicles behind and other bright light sources, thereby improving your rear view. Conversely, if you prefer a fixed mirror position without automatic adjustments, you can disable the function.
Regularly checking and adjusting this setting ensures that you always have a clear view of your surroundings, whether you are driving in low-light conditions or during the day. This thoughtful feature not only enhances safety but also minimizes eye strain, contributing to a more comfortable driving experience.
 or
or
 to
enable ("ON")/disable
("OFF") the automatic antiglare
function.
to
enable ("ON")/disable
("OFF") the automatic antiglare
function.
The icons will disappear if a button is not operated for approximately 5 seconds or more.
Adjusting the Display (Digital Mirror Mode)
To prevent the light sensors from malfunctioning
To prevent the light sensors from malfunctioning, do not touch or cover them.
WARNING
Observe the following precautions. Failure to do so may result in death or serious injury.
While Driving
Keep in mind that the perceived size of vehicles and other objects may differ between digital mirror mode and optical mirror mode. When backing up, always verify the area directly behind your vehicle-especially under dim conditions or at night, when the surroundings may appear less distinct.
To Prevent Causes of Fire
If you notice any smoke or an unusual odor coming from the Digital Rear-view Mirror while it is in use, discontinue operation immediately and contact your Toyota dealer. Continuing to use the system under these conditions could result in a fire.
Cleaning the Digital Rearview Mirror
Cleaning the Mirror Surface
A dirty mirror surface can impede the clarity of the displayed image. To ensure optimal visibility, gently clean the mirror surface with a soft, dry cloth.
Cleaning the Camera
If the Digital Rear-view Mirror image becomes difficult to see due to water, snow, mud, or other debris on the camera lens, activate the camera washer or switch to optical mirror mode.
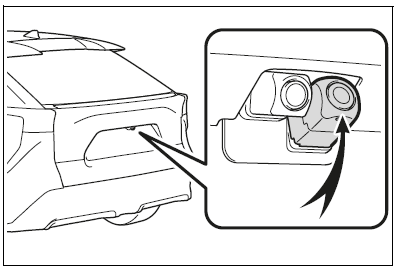
The Camera
The camera for the Digital Rear-view Mirror is strategically located to capture a comprehensive view of the area behind your vehicle. Be sure to refer to the system diagram or your vehicle’s manual for the exact placement.
Cleaning the Camera with Washer Fluid
Proper maintenance of the Digital Rear-view Mirror’s camera is essential for clear visibility and safe driving. When cleaning the camera with washer fluid, please follow these guidelines to ensure the best performance:
NOTICE
To Prevent the Digital Rearview Mirror from Malfunctioning
To Prevent the Camera from Malfunctioning
It is crucial to follow these precautions to keep the camera in optimal working condition:
Regular cleaning and maintenance are critical for the optimal performance of your Digital Rear-view Mirror. Such careful upkeep ensures that the camera consistently delivers clear images under various driving conditions, enhancing overall safety and driving comfort. Advanced features like these, which are incorporated in innovative vehicles such as the Toyota bZ4X, contribute to a sophisticated driving experience by merging cutting-edge technology with robust safety measures.
If you notice any symptoms
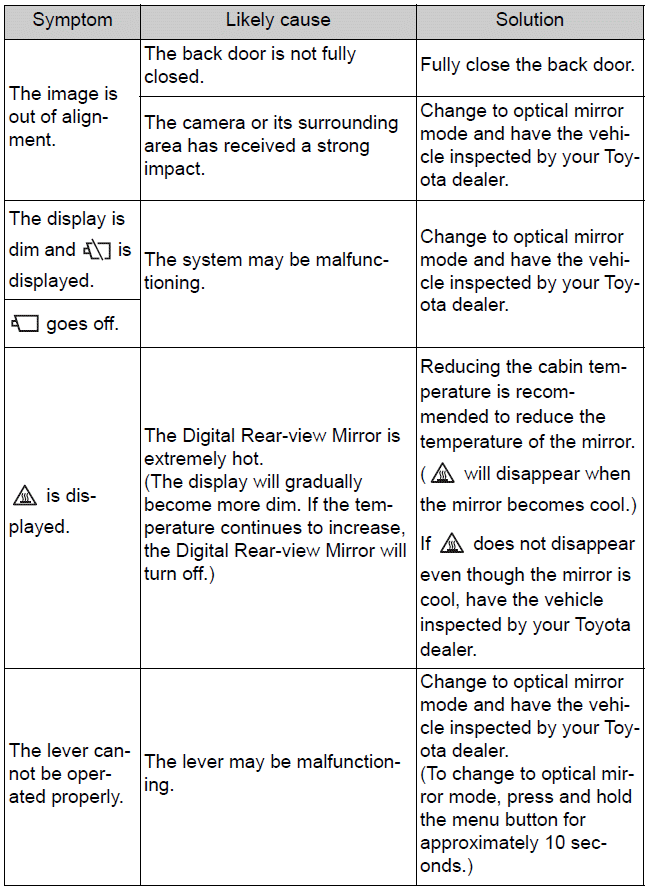
If you notice any of the following symptoms, refer to the following table for the likely cause and the solution.
If the symptom is not resolved by the solution, have the vehicle inspected by your Toyota dealer.

Symptom:
The image is difficult to see.
Likely cause:
The mirror surface is dirty.
Solution:
Clean the mirror surface gently, using a soft dry cloth.
Likely cause:
Sunlight or headlights are shining directly into the Digital Rearview Mirror.
Solution:
Change to optical mirror mode.
(If the light is coming through the panoramic moon roof [if equipped], close the electronic sunshade.)
Likely cause:
Solution:
Change to optical mirror mode.
(Change back to digital mirror mode when the conditions have improved.)
Likely cause:
Foreign matters such as water droplets or dust is on the camera lens.
Solution:
Symptom:
The image is out of alignment.
Likely cause:
The back door is not fully closed.
Solution:
Fully close the back door.
Likely cause:
The camera or its surrounding area has received a strong impact.
Solution:
Change to optical mirror mode and have the vehicle inspected by your Toyota dealer.
Symptom:
 is
displayed.
is
displayed. goes off.
Likely cause:
The system may be malfunctioning.
Solution:
Change to optical mirror mode and have the vehicle inspected by your Toyota dealer.
Symptom:
 is displayed.
Likely cause:
The Digital Rear-view Mirror is extremely hot.
(The display will gradually become more dim. If the temperature continues to increase, the Digital Rear-view Mirror will turn off.)
Solution:
Reducing the cabin temperature is recommended to reduce the temperature of the mirror.
(  will
disappear when
the mirror becomes cool.)
If
will
disappear when
the mirror becomes cool.)
If  does
not disappear
even though the mirror is
cool, have the vehicle
inspected by your Toyota
dealer.
does
not disappear
even though the mirror is
cool, have the vehicle
inspected by your Toyota
dealer.
Symptom:
The lever cannot be operated properly.
Likely cause:
The lever may be malfunctioning.
Solution:
Change to optical mirror mode and have the vehicle inspected by your Toyota dealer.
(To change to optical mirror mode, press and hold the menu button for approximately 10 seconds.)
 Steering Wheel adjusting
 Outside Rear View Mirrors
Hyundai Rear Cross Traffic Alert (RCTA) for Enhanced Backing Safety
The Rear Cross Traffic Alert (RCTA) function in your Hyundai utilizes the BSM rear side radar sensors, which are strategically installed behind the rear bumper. This innovative safety feature is designed to greatly assist the driver in checking those hard-to-see areas directly to the left and right ...
Do-it-yourself Maintenance: Pre-driving Safety and Equipment Checks
WARNING
Pre-driving Check
Always verify that the hood is completely closed and securely locked before driving. An improperly secured hood can unexpectedly open while the vehicle is in motion, posing a serious risk of accidents that may result in death or severe injury.
After Installing th ...
